This post contains affiliate links.
I have in my baking arsenal the hands down, BEST recipe for homemade cinnamon rolls… and I don’t think I should gate keep it any longer!
I’ve been making these for over 10 years now. They’ve become a staple for our holiday season and a great means to connect with my kids and husband. In fact, the other day my step-daughter and I were talking about the upcoming holidays and the ways in which we plan to celebrate them, and she mentioned she cannot wait for these cinnamon rolls.
I’m personally big on traditions, especially for the holidays. Each year I make a batch of these cinnamon rolls for us to eat while we watch the Thanksgiving Day Parade. Between the sounds and sights of the parade, the smell and taste of these cinnamon rolls, and the smells of the turkey “turkeying” in the oven, our house feels magical. It really brings us together. It’s something I begin to look forward to as soon as trick or treating is over and the Halloween decorations are put away.
What you’ll need…
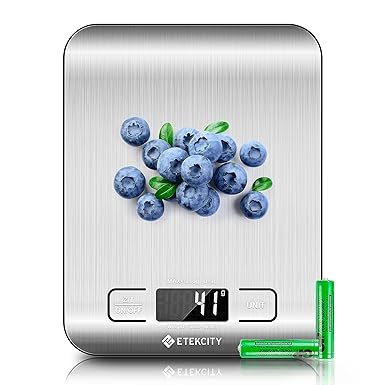
Now, there are two kitchen tools that I am going to recommend, which I’ve found to be incredibly useful in the execution of this recipe.
The first is a digital kitchen scale because this recipe is from Alton Brown who encourages measurements by weight instead of unit. Especially flour which is an agricultural product, which means each batch can be different than the other. Sometimes the batch is more dry or more humid, and this can change the weight and amount you should be using for your recipe.
Using a digital scale will ensure you’re using the correct ratio of ingredients so your cinnamon rolls turn out perfectly every time.
I like this one on Amazon

I like this scale because it:
- Is made of food grade stainless steel
- And while you still need to wipe it down to clean it, stainless steel has some antimicrobial properties because it is a non-porous surface which prevents things like bacteria, viruses and stains from soaking in.
- It only requires two AAA batteries
- It accurately weighs up to 11lbs
- And it’s really cost effective for what you’re getting
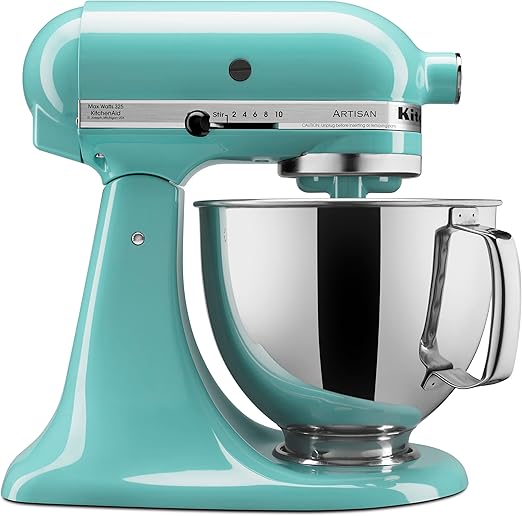
The second kitchen tool I recommend is a stand mixer with a dough hook attachment. You could mix and knead the dough by hand but Alton has given very specific instructions in his recipe about length of time of kneading using a stand mixer, so having one will increase your odds of your cinnamon rolls turning out the way they are intended.
I absolutely love my KitchenAid mixer and so that is the mixer I am going to recommend in this post.
I received mine as a Christmas gift from my ex-mother in law 15 years ago. It is lime green, which was my aesthetic back then 🙂. Today I kind of wish it would die so that I could purchase one in a more neutral color; however, KitchenAid is a really good brand that is supposed to last a very, VERY long time, and so I don’t think I’ll be getting to purchase a different one any time soon. In fact, when my ex-mother in law gifted it to me, she commented on the KitchenAid brand and its durability, and pointed out that she was still using her KitchenAid mixer she had gotten when she first got married. Luckily the lime green still works in my kitchen today!
I use my KitchenAid for a lot of things. For example:
- Pizza dough
- Ice cream (this is a separate attachment you have to purchase)
- Zoodles (again, a separate attachment)
- Cakes
- Frosting
- Fresh whipped cream to dollop onto hot cocoa or coffee after dinner
- Scones
- Biscuits
- Pie crusts
- I shred cooked chicken breasts using the paddle attachment (which is way easier than using a fork and it does a way better job)
- My Christmas cut out cookie recipe (the dough is so thick that you’d give yourself carpal tunnel if you made them by hand all the time)
In terms of size, I have a 5 quart and I personally don’t think I’d go any smaller than that because I do have some cookie recipes where the ingredients seem to JUST fit.
This one on Amazon is what I’d recommend. It comes in SO MANY different colors. REMEMBER…choose a color you think you’ll love 10, 15, 20+ years from now 🙂.

So, without further ado, here’s the Recipe. Again, I can’t take credit for it because it is not mine. It is Alton Brown’s Overnight Cinnamon Rolls recipe.
Alton Brown’s Overnight Cinnamon Rolls Recipe
Ingredients
Dough:
4 large egg yolks (room temperature)
1 large whole egg (room temperature)
2 ounces sugar
3 ounces unsalted butter, melted (approximately 6 tablespoons)
6 ounces buttermilk, room temperature
20 ounces all-purpose flour, plus additional for dusting
1 package instant dry yeast, approximately 2 ¼ teaspoons
1 ¼ teaspoons kosher salt
Vegetable oil or cooking spray
Filling:
8 ounces light brown sugar
1 tablespoon ground cinnamon
Pinch of salt
¾ ounce unsalted butter, melted, approximately 1 ½ tablespoons
Icing:
2 ½ ounces cream cheese, softened
3 tablespoons milk
5 ½ ounces powdered sugar
Directions
For the dough: in the bowl of a stand mixer with the whisk attachment, whisk the egg yolks, whole egg, sugar, butter, and buttermilk. Add approximately 2 cups of the flour along with the yeast and salt; whisk until moistened and combined. Remove the whisk attachment and replace with a dough hook. Add all but 3/4 cup of the remaining flour and knead on low speed for 5 minutes. Check the consistency of the dough, add more flour if necessary; the dough should feel soft and moist but not sticky. Knead on low speed 5 minutes more or until the dough clears the sides of the bowl. Turn the dough out onto a lightly floured work surface; knead by hand about 30 seconds. Lightly oil a large bowl. Transfer the dough to the bowl, lightly oil the top of the dough, cover and let double in volume, 2 to 2 1/2 hours.
Combine the brown sugar, cinnamon and salt in a medium bowl. Mix until well incorporated. Set aside until ready to use.
Butter a 9 by 13-inch glass baking dish. Turn the dough out onto a lightly floured work surface. Gently shape the dough into a rectangle with the long side nearest you. Roll into an 18 by 12-inch rectangle. Brush the dough with the 3/4-ounce of melted butter, leaving 1/2-inch border along the top edge. Sprinkle the filling mixture over the dough, leaving a 3/4-inch border along the top edge; gently press the filling into the dough. Beginning with the long edge nearest you, roll the dough into a tight cylinder. Firmly pinch the seam to seal and roll the cylinder seam side down. Very gently squeeze the cylinder to create even thickness. Using a serrated knife, slice the cylinder into 1 1/2-inch rolls; yielding 12 rolls. Arrange rolls cut side down in the baking dish; cover tightly with plastic wrap and store in the refrigerator overnight or up to 16 hours.
Remove the rolls from the refrigerator and place in an oven that is turned off. Fill a shallow pan 2/3-full of boiling water and set on the rack below the rolls. Close the oven door and let the rolls rise until they look slightly puffy; approximately 30 minutes. Remove the rolls and the shallow pan of water from the oven.
Preheat the oven to 350 degrees F.
When the oven is ready, place the rolls on the middle rack and bake until golden brown, or until the internal temperature reaches 190 degrees F on an instant-read thermometer, approximately 30 minutes.
While the rolls are cooling slightly, make the icing by whisking the cream cheese in the bowl of a stand mixer until creamy. Add the milk and whisk until combined. Sift in the powdered sugar, and whisk until smooth. Spread over the rolls and serve immediately
There you have it!
I hope you give this recipe a try and when you do, I hope it sparks a new tradition in your household as it has in mine.
If you’re interested in more tried and true recipes, I have two boards on Pinterest full of recipes I have tried and deem worthy of making again. Find and follow me by clicking this icon:
If you want to stay up to date on new blog posts, sign up here:
